As a child I loved the magical idea of Rudolph and the other reindeer flying through the sky pulling Santa's sleigh. I think that's why I love this magical stamp from Elusive Images. It's part of the Christmas Fusion Themeplate.
To make this card I first made a background with shimmery blue Glimmer Mists which I covered with clear UTEE and stamped "Rudolph" into it using Encore Metallic Silver ink. Finally I gave him a lovely red nose with a tiny spot of Christmas Red Stickles Glitter.
The backing paper is from the Artylicious Season's Greetings CD. It's actually a very plain paper with just a very soft graduated shading on it, but I used another stamp from the Christmas Fusion Themeplate and some more of the Encore silver ink to stamp that lovely star flourish all over it.
Finally I assmebled my card, staying with the "star" theme by using some star effect holographic card to layer with and by adding a few faux gems in the shapes of stars to the card.
This card is my card for August's "Fab's Big Christmas Challenge" - I don't think I am going to do the nutter's challenge this month - it's EIGHT cards before the 25th of September, but we shall see, maybe I will find enough time this month!
Saturday, 30 August 2008
Thursday, 28 August 2008
Blog Candy from Glenda Waterworth
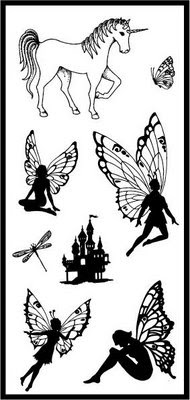
OH MY GOODNESS, I am one of the lucky people chosen to help Glenda give away some of her fabulous new faery stamps! Here it is, the delightful "Dragonfly Faeries" themeplate. To win this magical collection of stamps all you need to do is leave a comment here - the winner will be chosen by a random number generator. Then why not visit Glenda's blog to see the other beautiful Faery stamps and find a list of her blog readers - that list may just help you find the other Faery themeplates! To get to Glenda's blog just click on the picture of the Dragonfly Faeries themeplate and by faery magic you will be taken there ...
OK it's not magic, it's the wonders of modern technology and the world wide web, but hey that spoils the magical mood.
The competition closes at Midnight on Saturday, 6th September 2008, so be sure to leave a comment before then.
OK it's not magic, it's the wonders of modern technology and the world wide web, but hey that spoils the magical mood.
The competition closes at Midnight on Saturday, 6th September 2008, so be sure to leave a comment before then.
Saturday, 23 August 2008
Another "Messy Rabbit" Stamp for Christmas
I like this little snow covered house. It's part of the "Messy Rabbit" series of stamps from Joanna Sheen, but while you can use it along with the rabbit images, it stands up all on it's own to make a simple but fun Christmas Card.
Here I have stamped the house, water coloured it and then used coloured Sakura Glaze pens to make the Christmas lights around the roof of the house stand out and the clear glaze pen on the windows so they appear to have glass in them. Finally I added some "Snow Writer" from DecorArt to all the parts of the image where there was snow and sprinkled that with Crystal glitter.
The backing paper is from my Artylicious "Season's Greetings" CD, and the Sentiment stamp is a little cheap one I got in one of those bargain tubs you see in craft shops. Sorry about the photo, it's just not doing the card justice. Anyhow that's another one for Fab's Big Christmas Challenge this month.... only 2 more to go before Monday!
Labels:
Artylicious CD,
Joanna Sheen,
Messy Rabbit,
Sakura Glaze Pen
Friday, 22 August 2008
Getting on with Christmas Card Making
It was easy to get motivated for Christmas card making yesterday after the postman deivered my new stamps from Joanna Sheen. She has a very cute new range of stamps called "Messy Rabbit". I used the a stamp from the plate called "Baggy Jumper" which I stamped in Black Stazon then coloured with Prismacolour Pencils and belended with artist's low odour white spirit.
The finished image was mounted onto papers from a Crafter's Companion CD and some blue Mirri card and a little bow was added for a finishing touch. The sentiment comes from a little set of clear text message stamps which hubby bought for me from a local craft shop - not sure what make they are but the tiny text is often quite useful.
This makes a total of 4 cards made for this months "nutter's challenge" on Fab's big Christmas Challenge - 3 more to go before the 25th, I guess I had better get a move on!
Thursday, 21 August 2008
Florrie's Weekly ATC Challenge - Trees
The theme this week on this challenge hosted by Craft Swap forum is Trees, and I guess the awful weather we are having has got me in autumnal mode already! I made my ATC using various inks in yellows, orange, green, russet with a tiny amount of pink to create a background that would create an autumn feel then inked up my tree stamps from The Angel Company in autumn colours using Stampin' Up marker pens and stamped them onto my background. Once the trees were in place I sponged on some more brown inks to ground the trees. Finally I added a leaf from a set of clear stamps purchsed in The Stationary Box which I heat embossed with copper EP and some pretty cabochon gems that match the colours in the ATC.
Wednesday, 20 August 2008
Bling!
I got a bit carried away with the sparkle perhaps, but what the heck, I had fun making this card for a swap where the theme was to colour in something on your card. I decided it would be fun to stamp and heat emboss one of the big flowers from Elusive Images themeplate onto silver foil card and then colour it in with Sakura Glaze pens, which allow the silver foil to gleam through. I think the name of the themeplate "Diamante Delight" got stuck in my head because once the flower was ready I could not resist adding a ring crystal gems around the inner part. I think there must be close to 40 little gems on it despite the fact it was already sparkling due to being embossed with Stampin' Stuff's "Disco Black" EP which is a holographic powder.
Next I stamped and embossed a stem element and a double flourish from the Diamante Delight themplate onto some green card using the same black holographic EP. This was layered onto some black card and more sparkle was added by appying a thin layer of Stickles "Star Dust" glitter glue to the revealed edges of the black card. Finally I attached my cut out flower to the top of the stem.
With my flower ready to mount onto a card, I made some backing paper by sponging some cerise and purple inks from a Kaliedacolor Inkpad onto a pale lilac paper and then stamped the flourish stamp into diagonally opposing corners and extended this along the top and bottom edges. The paper was then applied to black card and my flower was mounted on top with foam pads. So much sparkle made this a tricky card to get a photograph of but I think the one I did manage to get shows the card reasonably well.
Aw, thank you Sandra and Rachel
Apparently I am a "Wilde Woman", my freind Rachel has given me an award to say so!
The rules for this are award are:
1. You can give it to one or one hundred or any number in between - it's up to you. Make sure you link to their site in your post.
2. Link back to this blogsite so Tammy can go visit all these wonderful women and remember the Purpose of the Award is to send love and acknowledgment to women who brighten your day, teach you new things and live their lives fully with generosity and joy.
I am going to pass this on to Jenny who does not publish so much work but when she does always publishes wonderful things.
And another
Not only am I a Wilde Woman, but Sandra who designs stamps for Kadoodle has very kindly given me this. If you have not seen Sandra's stamp designs then pay a visit to her blog or to the Kadoodle Stamps Blog.
The rules for this award are :
The rules of the award are :-
1,The winner can put the logo on her blog.
2,Link to the person you received your award from.
3,Nominate at least 7 other blogs.
4,Put links of those blogs on yours.
5,Leave a message on the blogs of the girls or boys you’ve nominated.
There are so many fab bloggers out there who's blogs I visit so I will have to think a bit about who to pass this onto.
Monday, 18 August 2008
Stampbord Challenge Card
This card was made for a challenge on Glenda Waterworth's blog. The challenge was to use stampbord on a project along with Elusive Images Stamps. It took me a while to decide which stamps I would use for this challenge as so many of the Elusive Image designs work beautifully on Stampbord, but finally I settled on stamps from the new Fantasy Floral Themeplate which has been designed to co-ordinate with the paper designs on the Artylicious CD of the same name. It was quite a tricky piece to photograph due to the light reflecting off the UTEE on the stampboard, but the close up shot shows the stambord more clearly.
First I coloured my stampbord piece with inks from a Petal Point Fluid Chalk ink pad, then stamped my image on top of that using black Archival Ink. Next I scratched off some of the colour from the stampbord to highlight the flowers and some of the leaves. Finally I edged the piece with a gold Sakura Pentouch pen and coated the surface with a couple of layers of UTEE to give a glossy enamelled look to the finished piece.
Next I chose one of the co-ordinating papers from the CD and also some card stock in colours that would match those in the printed paper and in the stampbord peice. My green card stock was a little too pale so I sponged on some of the same green ink I had been using on the stampbord to get the shade I wanted. I cut out my square of floral paper from the printed sheet and cut an X shape in the center to allow me to roll back the flaps and create a frame for my stampbord to sit in. Before rolling back the flaps I inked the reverse side of the paper in some of the terracotta ink I had used on the stampbord so as the rolled back flaps would not show bright as white.
Next I took a small leafy spray from the same set of stamps and created borders at the top and bottom of my green card by stamping with versamark and heat embossing with copper EP. The last step was to assemble all of my elements and to add the organza bow. The bow is kind of crinkly because I heated quicky with my heat tool. This makes the organza shrivel a bit and creates an interesting effect, but if you try it be careful because if you heat too much holes will start to form in the ribbon.
Labels:
Artylicious CD,
Elusive Images,
Sakura Pentouch Pen,
Stampbord,
UTEE
Friday, 15 August 2008
Pop-Up Card
This card was made for a challenge swap, the challenge was to make a pop-up card. As soon as I signed up to join the swap I knew I wanted to use my set of cute doggy stamps from The Angel Company and make a 3D scene with them.
First I stamped the dog, his kennel and the little grass stamp with black Stazon. I coloured the images with Prismacolor Pencils, using low odour white spirit and paper stumps to blend the colours and then cut this out. With my pop-up element made the next job was to cut a liner for the inside of my card. This would become both the mechanism for my pop-up and also the background scene.
Next I measured the height and width of my cut out images and made the corresponding cuts and scores in my liner to enable me to fold the mechanism and then coloured my background by masking off areas and sponging on some Adirondack Dye inks for the hills and sky. The sun was also masked and then colour sponged on using Distress Ink and some light orange from a Kaleidacolour ink pad over the yellow Distress Ink to give it a little more "heat". Finally I took some Tree stamps from another The Angel Company set and stamped in my trees using more Distress Ink.
The front of the outer card has been decorated with papers from the Artylicious Butterfly Bliss CD and stamped with a text stamp from the same set of stamps I used for the pop-up images. However, while the little dog on the outside is also from The Angel Company, he is not part of the set I had been using for the inside of the card. I also use one of the inserts from the Butterfly Bliss CD to line the facing side of my liner (the bit where you would write your message to the receipient of the card).
With this all done the last step was to adhere the inner pop-up part of the card to the outer card and then mount my pop-up element onto the mechanism. There was quite a lot of work in this card, but I think the end result is worth the effort.
Thursday, 14 August 2008
Blog Comment form and Gimme an Inch....
... well 4 inchies actually! Oh boy am I late with this swap - sorry Jan.
This is my second attempt at inchies and I still think they are tough little devils to make. The swap was to make 8 and to make 2 of each so that we could swap one set and keep one. With the eight swaps we receive we will have sixteen inchies to then use in a project of our own devising.
I started with one theme in mind, using images of ladies, but half way through it dawned on me that my 4 beauties were very seasonal and it would be fun to make a corresponding inchie to match each season, Spring, Summer, Autumn and Winter. Now I was on holiday when this idea struck so it had to wait till I got home, and the mammoth craft room tidy up had to be done first.. oh well enough of the excuses I finally got my other 4 inchies finished so here are my Four Seasons inchies.
The bevy of beauties are all taken from the Garden Themplate from The Artistic Stamper which was stamped in Black Stazon then watercoloured. The complimentary inchies are stamped onto backgrounds made with Glimmer Mists using various stamps or elements from a stamp as follows : Spring - Stamp by Personal Impressions; Summer - Stamp by Elusive Images, the Just Butterflies Themeplate; Autumn - stamp from a set of clear stamps origin unknown; Winter - stamp from a Stamp Tapestry set.
Blog Comments Form
For those of you who are kind enough to take some time to leave me a comment I hope you will agree with the change I have made. For myself I find when I visit other blogs I am preferring the option where the comments open in a seperate pop-up window so I thought I would change to that setting here. Feel free to say if you prefer it the other way round.
Labels:
Elusive Images,
Glimmer Mists,
Inchies,
The Artistic Stamper
Wednesday, 13 August 2008
Birthday Card
I bought this stamp a while ago and decided it was time to use it for card I needed to make for a Birthday swap list I am in. The stamp is from Stamp-It and was stamped in Black Stazon then coloured with brush markers. I added some Clear Sakura Glaze pen over the flowers and some Sakura Stardust pen over the gift that the sheep are carrying to give some dimension. The paper is one that was included in a craft magazine a while back, but can't remember which one.
Monday, 11 August 2008
More Glitter from Foilplay
While I had my glitters out I found my mind turning to Christmas and to an old stamp, one of my very first stamps infact. It was bought for the princely sum of 99 pence from my local craft shop and has lain forgotten about until I dug out all my stamps the other week to make a catalogue of my collection. I wanted to make a some more cards for Foilplay and I also wanted to make a card for this months Fab's Big Christmas Challenge. The idea that was forming in my head seemed like it would suit both projects. I think this card made with my little cheap stamp, some heat embossing and some more of that lovely glitter from Foilplay has turned out rather well. Oddly enough as well as the stamp being a purchase from my early days, I can recall that this particular glitter was part of my first order from Foilplay! It's the lightest colour from a set of 3 shades of blue glitter.
To make my card I stamped and heat embossed the image 3 times, then applied my glitter inside the embossed outline using a Sakura Quicky Glue pen to "colour in" the area and then sprinkling on the glitter. Once the glue was dry I covered the snowflake with a layer of Glossy Accents to seal in the glitter and to give more dimension. The greeting was stamped and heat embossed with a stamp from Dimension Fourth. All the elements were inked round the edge using ink from a Petal Point Liquid Chalk pad and then mounted onto silver mirror card. The backing paper on the card is from a Crafters Companion CD and was also edged with the same ink as the snowflake and greetings elements.
I suspect most stampers have stamps like this one, cheap ones we bought when we first started out, but which we dismiss from our minds as we progress, learn more techniques and find far more interesting stamps to buy. Suddenly those early "bargain buys" are no longer deemed to be worthy. However, I think this card taught me a lesson, by dismissing those early cheap stamp purchases from my mind I am simply depriving myself of a wider range of card making opportunities. It would be fun to know if this post has inspired anyone else to go and see what they can make with old stamps they have forgotten they own.
Sunday, 10 August 2008
Glitters from Foilplay
Perhaps I should first explain how I got started Cardmaking and Stamping. I got hooked while awaiting surgery. The condition I had would often wake me up in the middle of the night with pain and at 2am there is not really a great deal to watch on Television except for Shopping Channels - I found Create and Craft and got hooked. Through that I ended up becoming a member of a craft forum, Craft Telly, and on that forum I met Winspiration, the owner of Foilplay, and found out that she stocks a fabulous range of glitters..... not sure if I have said this before, but I am a glitter junkie as well as a stamp and ink addict... if it sparkles it's MINE. Anyhow the end result was that I bought some glitters from Win, who I might add offers not only great prices but also excellent service to her customers. The glitters are lovely, ultra fine art quality and have become a mainstay of my craft stash, especially for Christmas cards.
Recently Win asked if some of the forum members would design some cards for her to use to illustrate her products, and she has even sent me some foils to try, so watch this space for my first efforts using foils. But meantime here is my first card for Foilplay using some of Winspirations delicious glitters.
I have used one of my all time favorite stamps, the Floral Spray Themeplate from Elusive Images - an all time favorite because it is such a verstile image. I stamped and then heat embossed the image onto black card using Silver EP. Then applied the glitters from Foilplay using a Sakura Quickie Glue Pen, also supplied by Foilplay. This was mounted onto sliver mirror card and then onto pearlescent card in a lovely amythyst colour that co-ordinates perfectly with the colours of the glitter. Personally I think the end result just looks scrumptious and I wish I could show you the card for real because the camera just does not capture the intensity of the sparkle from the glitter.
Friday, 8 August 2008
Meet Darcy and Gizmo
I couldn't resist sharing these photographs from my holiday down at Barnard Castle. We visited Thorpe Park Farm which is just a short distance from the town and where there is a Bird of Prey Centre which had some absolutely magnificent birds of prey on show. In particular they had some beautiful owls, I have always liked owls. It was amazing to see the display they did with some Harris Hawks and a Gyr Falcon cross bred in which they demonstrated some of the techniques used to train a bird of prey.
After the display you could meet the bird of your choice and have your photo taken holding the bird. Well I had been smitten by the beautiful Darcy who is a Great Gray Owl so here she is (the photo on the left of the top 2 images). Gizmo is a Wood Owl and was hubby's choice of feathery freind. Isn't mother nature just amazing in the way she shapes the plummage on these bird faces into a saucer shape to help direct sound so they can locate their prey more efficiently.
Thursday, 7 August 2008
Chic
This card was made for a swap where the theme was "chic". I love this elegant Erte lady stamp from Clarity Stamp, very stylish and elegant! The papers are from the Artylicious Filigree Fusion CD, and the stamp used on the UTEE is from the Filigree Fusion Themeplate designed by Elusive Images to co-ordinate with the papers on the CD.
Wednesday, 6 August 2008
Christmas with Elusive Images
At last I can show you some of what I made when I was away at the Graphicus Workshops. It has taken so long because my craft room could only be described as "the mother of all pigstys". I promised myself that before I touched a single stamp or inkpad I would give it a proper tidy up. Hubby was due back at work before me so we enjoyed the rest of our holiday then this week I have been busy tidying my messy room. I have also stamped most of my stamps and my freind's stamps too in order for us to have a catalogue we can share. We borrow each other's stamps and we both agreed a catalogue would be a great way to keep track of what stamps we do have in our respective collections. Anyhow enough of the drivel and onto the good stuff!
These are 2 of the 3 cards I made with Glenda during the "An Elusive Images Christmas" workshop. The card designs are Glenda's and you may have seen her demo these on Create and Craft. I did not manage to finish all 3 cards at the workshop because we were running out of time, the third card still needs to be completed, but I am not happy with the work I did on acetate at the workshop, but I have an idea for something else to complete the card and may do that.
For the card on the left we first created a backing paper using Glimmer Mists and Glimmer Screens, and a second paper by stamping a text stamp. The crowns were stamped using a resist technique, painted with Ecoline Watercolours, cut out and mounted onto small squares of papers cut from the Artylicious Seasons's Greetings CD. The stamps we used came from the Gold, Frankincense and Myrrh themeplate.
To make the card on the right we used candle stamps for the main image from the Hearth and Home themeplate and could choose any stamp we wanted to make our background on the black card. I chose to use a stamp from the Snow is Falling themeplate on the background. The candles were stamped first and then we used Glossy Accents on the Candle itself to create a resist. Once the Glossy Accents were dry we used Tinkabella Inks which dry with a slight sheen to paint the design. The Glossy Accents resist the ink and allow the white of the card stock to show through.
Hopefully over the next few days I can show you the other things I was making, and also make some of the card ideas I have had floating around in my head for the last 2 weeks! I am also hoping Fab will allow me to count these cards for the July Fab's Big Christmas Challenge as the "nutter" challenge this month is to make seven Christmas cards before the 25th of August!
Friday, 1 August 2008
Back !!!
Well I got home on Wednesday evening, but have been busy sorting out laundry and other mundane tasks that are the aftermath of a holiday. Done some catching up with freinds too, and needless to say catching up with blog posts. Had fabulous time down at Graphicus over last weekend - I did 2 workshops. The first was "An Elusive Images Christmas" with Glenda Waterworth and Lynn Robinson-Hunter teaching.... WOW WOW WOW!!!
On the Friday morning we made a gorgeous Christmas Organiser Book using the Bind It All with Lynn, and in the afternoon we made 3 lovely Christmas Cards with Glenda using the new Elusive Images stamps. I learned a really neat stitching method from Glenda which we used on one of the cards - it's a Japanese Stab Stiched binding which is an ancient japanese book binding technique.
Both ladies had packed so much into their classes that my BIA book still needs the final trimmings to be attached and 2 of my cards still need to be assembled - errrr I am rather a slow crafter but boy did I have fun. Once everything is finished I will post pics and details of what materials we were using.
On Saturday did an Advanced Metal Art class with Lynn and made, or at least started to make my first ever canvas. To be honest it's not close to being finished really - I was getting kind of stuck as this was something I had never done before and when I am faced with new things I often need time to just walk away from the project and think some about it. Also, at times it did need to dry a bit before I added anything else - after we came back from lunch I found the inks and sprays I had been using had dried and the colours had softened, something I was not expecting, but which looked even better than it had when it was wet! However that also made me need to think some more about what I would do next. I hope I can finish it myself now I home even though I don't have a fraction of all the lovely inks and paints and stuff that was available for us to use at Graphicus. Anyhow even if I can't quite make this one turn out the way I want it has been a really fun learning process and I will certainly try making some more canvases in the future as I am sure I can only get better with experience and this first one has been such fun to do so far.
If you are able to get to Graphicus, which is located in Barnard Castle in the North East of England then I can recommend the workshops they run. Both Glenda and Lynn are not only enormously talented crafters, but also gifted teachers who are passionate about sharing their skills with others..... thank you both because you made my weekend so much fun and I learned heaps.
Subscribe to:
Posts (Atom)