Sunday, 22 January 2017
Sad Day
I know I've not posted in such a long time but it seems right that I should mark the passing of Jayne Nestorenko, Jayne's appearances on Create and Craft many years ago were the inspiration that got me hooked on stamping. She made it look so easy and so much fun. Her passing is a loss to the crafting world. My deepest condolences to all who were close to Jayne.
Thursday, 24 April 2014
More stuff from a while back
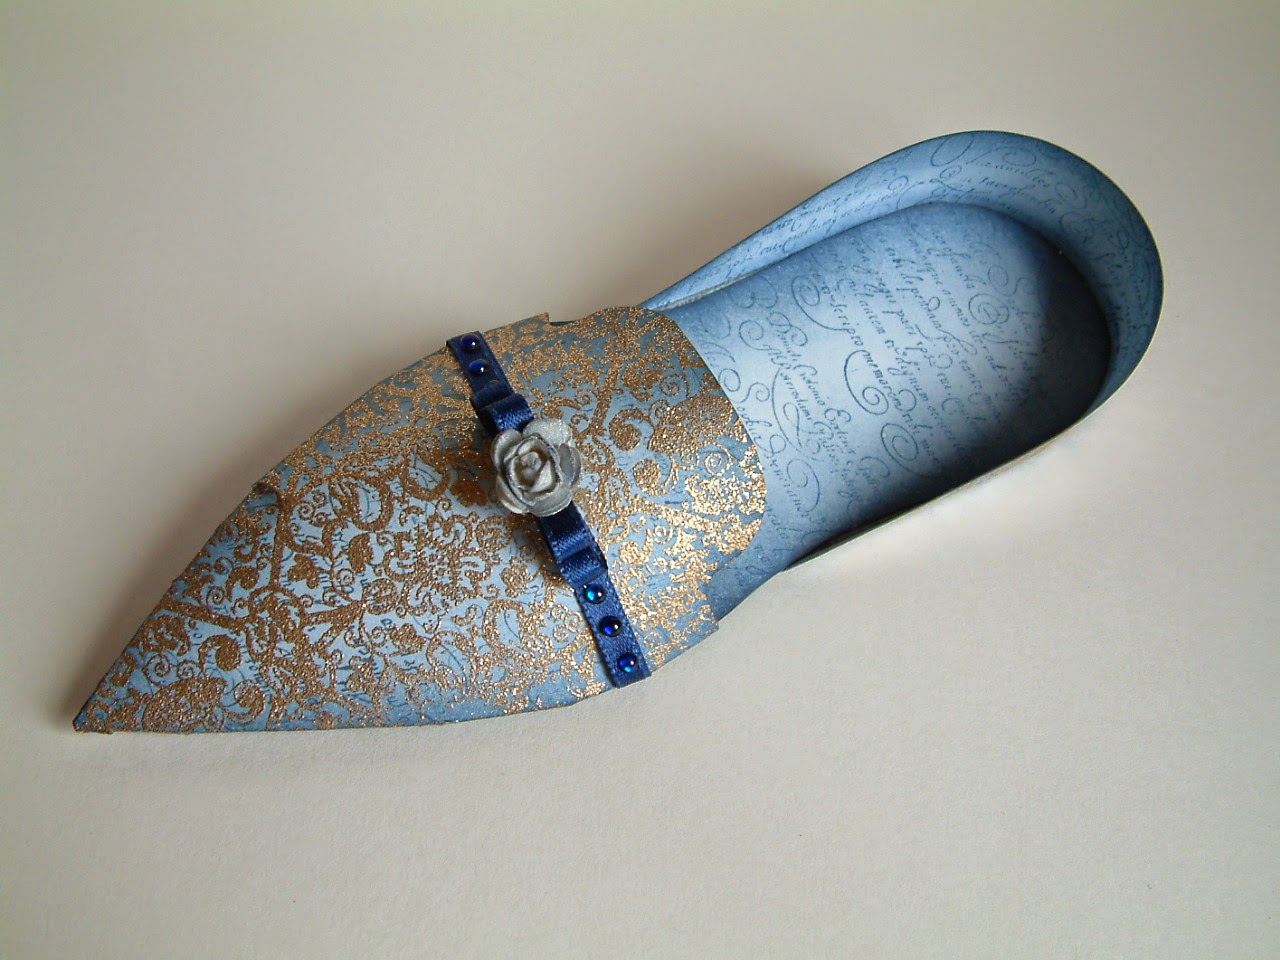
Once I had cut out all the parts needed for the shoe from plain white card I coloured them by blending Chipped Sapphire Distress Ink onto each piece, then stamped over using a script stamp from the Eccentric Edwardian theme-plate currently available from Chocolate Baroque. On the outside upper and heel pieces I over-stamped and heat embossed with a gold sparkle embossing powder (my photo only shows the gold embossing on the upper, sorry). The stamp I used was from an Elusive Images set which I seem to recall was called Damask Delights, but does not seem to be one of the designs saved by Chocolate Baroque, however they do have this very similar stamp available. Some narrow ribbon, gems and a paper rose spritzed with Glimmer Mists provided the finishing touches.
Tuesday, 15 April 2014
Here's One I Made Earlier...

Monday, 7 April 2014
Bones Update and a Wedding Card


The hand is healing slowly, the swelling is pretty much gone and the bruising has changed from shades of Black Soot, Faded Jeans and Seedless Preserves to lightly blended tones of Crushed Olive, Peeled Paint and Mustard Seed. Still don't have much grip so it will be a while longer before I can do much in the way of stamping. Meantime however I have found some old pictures of a Wedding Card I made using one of my favorite stamps. The beautiful Rose Script stamp is available from Chocolate Baroque.
The image was stamped and heat embossed in gold onto pearlescent card then painted with Twinkling H2Os. I used peel-offs for the gold borders and the greeting and made a box for the card to be delivered in.

Monday, 31 March 2014
Broken Bones
In December I tripped at work and fell - the result was I broke my right elbow and had some very painful soft tissue damage to my right hand. The silver lining to this was I ended up watching Create and Craft on telly while off work and by the time my arm was better I had rediscovered my lost stamping mojo.
Last Wednesday I fell again while walking the dogs - this time I landed on my left hand - so now I'm nursing 2 broken bones in that hand - I guess it will be a few weeks before I am stamping again.
Last Wednesday I fell again while walking the dogs - this time I landed on my left hand - so now I'm nursing 2 broken bones in that hand - I guess it will be a few weeks before I am stamping again.
Saturday, 22 March 2014
Engagement Card
 An engagement in the family was the reason for this card, or at least the reason to make a card of some sort, but what to make? I recently bought some of the Britannia Flower Dies and have been playing with making roses, and fuchsias etc so it seemed like I good idea to have a go at using the flowers on a card.
 Before being made into flowers the die cut flower shapes were painted with Twinkling H20 paints, English Lavender for the petals, Mustard Green for the calyx and leafy stems. When dry both paint colours have a lovely golden shimmer which I hope you can see in the photo. The "Celebrate" sentiment was stamped and heat embossed in gold onto the die cut in the centre. The stamp is one that came in a kit years ago from Hot Off The Press and the die is from Marianne Design Creatables. The card stock is ivory and gold pearlescent card, the gold being Moondust card from Southfields, the ivory was just some I had in my stash.
Thanks need to go to Joanna Sheen Ltd for posting this helpful video on YouTube as I am sure I would have struggled making the flowers without the clear instructions here.
Sunday, 16 March 2014
Poppies
 In a year of remembrance and commemoration it's obvious why this stamp by Chocolate Baroque from their Flora and Fauna themeplate has been on my mind. So in memory of those who paid with their lives while fighting for their country I have made this card.
The image was stamped in black Stazon, coloured with Prismacolor pencils and a little black glitter used in the middle of the flower on the stamens. The background was made using the same stamp and Satlin Red Versafine ink which I stamped off onto scrap before stamping the second generation image on my card. There was going to be a bow, or some gems or something, but no matter how I tried fiddling around with possible embellishments nothing seemed to really add anything to the card.
Thursday, 13 March 2014
Retro Shadow Stamped Card
 Was watching TV and the printed design on the top a presenter was wearing made me think of some stamps I bought from Elusive Images some years back. Elusive Images is gone, but many of the stamp designs are available from Chocolate Baroque - these ones may be too but I'm not sure. The greeting is a stamp by Hobby Art. The card is stamped with Bundled Sage, Seedless Preserve and Shaded Lilac Distress inks, some are first generation impressions and some second generation.
Friday, 7 March 2014
A Card for A Friends Birthday.

Inks: Old Paper and Vintage Photo Distress Inks.
Die Cuts: Sizzix - Elegant Flourish from the Tim Holtz Alterations range. Spellbinders - Labels Four.
Image colored with Prismacolor pencils.
Wednesday, 24 November 2010
WOYWW 77

Subscribe to:
Posts (Atom)